
- Free Resources
- Project Search
- Featured Projects
- Member Benefits
1059 Main Avenue, Clifton, NJ 07011
The most valuable resources for teachers and students

(973) 777 - 3113
1059 Main Avenue
Clifton, NJ 07011
07:30 - 19:00
Monday to Friday
123 456 789
Goldsmith Hall
New York, NY 90210

- Why We’re Unique

Salt and the boiling temperature of water
Introduction: (initial observation).
At home hot water is used for cooking and heating systems such as hot water radiators. In laboratories hot water is used in water baths. Hot water has many industrial applications as well.
One problem with water is that it never gets hotter than 100º Celsius. Any additional heat will only cause more evaporation. Being able to control or modify the boiling point of water may be helpful for any applications requiring heat transfer.

In this project you will study the effect of table salt on the boiling temperature of water. Report your results in a table and draw a graph to visually display your results.
If you have any questions, click on the “Ask Question” button at the top of this page to send me your questions. I may respond by email, but often I update this page with the information that you need.
You will also need to know:
- How to select a project?
- What are variables (Dependent, Independent, Control)?
- What is a control experiment?
- How can I do analysis and discussion?
- Do I need a graphs or a chart?
- What is an abstract? How to write it?
- Samples of display boards
- How to write a report?
Project Advisor
Information Gathering:
Find out about boiling and boiling point point. Read books, magazines or ask professionals who might know in order to learn about the effect of salt on the boiling point of water. Keep track of where you got your information from.
matter : anything that occupies space and has mass.
mass : the quantity of matter contained by an object. Mass is measured in terms of the force required to change the speed or direction of its movement.
liquid : the state in which matter takes the shape of its container, assumes a horizontal upper surface, and has a fairly definite volume.
boiling point : the temperature at which the vapor pressure of a liquid equals the pressure of the gas above it.
temperature : measure of the hotness or coldness of a body.
pressure : force exerted on a unit area. The SI unit of pressure is the Pascal (Pa).
gas : the state in which matter has neither definite volume nor shape.
boiling -point elevation: the elevation of the boiling point of a liquid by addition of a solute.
Effect of air pressure
A liquid boils when its vapor pressure becomes equal to atmospheric pressure. Low atmospheric pressure causes the boiling point to go down; high pressure drives it up. Atmospheric pressure varies a bit from day to day, depending on the weather, and it varies from place to place, depending on the altitude.
Other related links:
- Boiling Point
- Boiling point elevation
- Boiling temperature of water solutions
Question/ Purpose:
What do you want to find out? Write a statement that describes what you want to do. Use your observations and questions to write the statement.
The purpose of this project is to determine the effect of salt on the boiling point of water.
Identify Variables:
When you think you know what variables may be involved, think about ways to change one at a time. If you change more than one at a time, you will not know what variable is causing your observation. Sometimes variables are linked and work together to cause something. At first, try to choose variables that you think act independently of each other.
- The independent variable (also known as manipulated variable) is the amount of salt.
- Dependent variable (also known as responding variable) is the boiling point of water.
- Controlled variables are the air temperature and pressure. Perform all your experiments in the same day while the air pressure and temperature will not be subject to noticeable changes.
Hypothesis:
Based on your gathered information, make an educated guess about the effect of salt on boiling point of water.
Following are two sample hypothesis:
Sample hypothesis 1:
I hypothesize that salt will reduce the boiling point of water. My hypothesis is based on my information that salt reduce the freezing point of water and it is used as an anti freeze in winter.
Sample hypothesis 2:
I hypothesize that salt will increase the boiling point of water. My hypothesis is based on my information that salt does not boil as easy as water, so when mixed with water it may make it hard for water to boil as well.
Experiment Design:
Design an experiment to test each hypothesis. Make a step-by-step list of what you will do to answer each question. This list is called an experimental procedure. For an experiment to give answers you can trust, it must have a “control.” A control is an additional experimental trial or run. It is a separate experiment, done exactly like the others. The only difference is that no experimental variables are changed. A control is a neutral “reference point” for comparison that allows you to see what changing a variable does by comparing it to not changing anything. Dependable controls are sometimes very hard to develop. They can be the hardest part of a project. Without a control you cannot be sure that changing the variable causes your observations. A series of experiments that includes a control is called a “controlled experiment.”
Introduction : In this experiment you will test the effect of table salt (sodium chloride) on the boiling point of water. You may repeat this experiment with other solutes such as sugar, Epsom salt (Magnesium sulfate) and Salt cake (Sodium sulfate). Experiment involve preparing salt-water solutions with different amounts of salt; heat them to the boiling temperature and then measure and record the temperature while the solution is boiling.

- Fill up a glass beaker or a small pot with 100 ml distilled water.
- Place a thermometer in the water several centimeters from the bottom of the pot. Make sure you are using a thermometer with at least one degree markings to insure accurate measurements.
- Begin to heat the water. Take temperature readings every 10 seconds.
- Continue reading the temperature until it remains constant for at least four measurements. This is the boiling point.
- Repeat the steps 1 to 4; however, each time add a different amount of salt to the water. Suggested amounts of salt are 5, 10, 15, 20 and 25 grams as shown in the following table.
Your results table may look like this:
- Use tap water or drinking water if you don’t have access to the distilled water
- If your pot or beaker are big and you need to do your experiment with more water, increase the amount of salt at the same ratio.
- C = Celsius Temperature Scale (Centigrade)
- F = Fahrenheit
- If you don’t have a scale to weight 5 grams salt, use one small tea spoon. That will hold approximately 5 grams of salt.
- The first experiment with pure water is also the control for your other experiments.
- 102ºC and 106ºC in the above table are possible answers reported by other students. Please note that they may be wrong or inaccurate!
Make a bar graph:
For each of the six solutions that you test make a vertical bar (so your graph will have 6 vertical bars). The height of each bar will represent the boiling temperature of one specific solution. The name of the bar will be the amount of salt added.

The bar graph in the right is for a similar experiment with only 3 different solutions. 0 is for no salt, 1 is for 1 table spoon and 2 is for 2 table spoon salt in one quart of water.
Materials and Equipment:

- Thermometer* (available at science suppliers),
- Glass beakers or metal pots,
- Electric stove (hotplate)
* Glass and dial thermometers shown above are available at MiniScience.com and klk.com. Either of the two models may be used for freezing temperatures. Dial thermometers last longer; however, glass thermometers are more accurate.
Results of Experiment (Observation):
The above table will be completed and used as the result of your experiment. You may also write in a paragraph or two the result. What you write may be an answer to the following questions:
1. What was the highest temperature that the salt water reached?
2. At what temperature does the pure water boil?
If the thermometer extends beyond the outside of the pot it reads a higher temperature. Heat from the stove burner makes the thermometer read higher. Keep the thermometer over the pot when making temperature measurements.
Calculations:
No calculation is required
Summary of Results:
Summarize what happened. This can be in the form of a table of processed numerical data, or graphs. It could also be a written statement of what occurred during experiments.
It is from calculations using recorded data that tables and graphs are made. Studying tables and graphs, we can see trends that tell us how different variables cause our observations. Based on these trends, we can draw conclusions about the system under study. These conclusions help us confirm or deny our original hypothesis. Often, mathematical equations can be made from graphs. These equations allow us to predict how a change will affect the system without the need to do additional experiments. Advanced levels of experimental science rely heavily on graphical and mathematical analysis of data. At this level, science becomes even more interesting and powerful.
Conclusion:
Using the trends in your experimental data and your experimental observations, try to describe the effect of salt on freezing point of water. Is your hypothesis correct? Now is the time to pull together what happened, and assess the experiments you did.
Related Questions & Answers:
What you have learned may allow you to answer other questions. Many questions are related. Several new questions may have occurred to you while doing experiments. You may now be able to understand or verify things that you discovered when gathering information for the project. Questions lead to more questions, which lead to additional hypothesis that need to be tested.
Possible Errors:
If you did not observe anything different than what happened with your control, the variable you changed may not affect the system you are investigating. If you did not observe a consistent, reproducible trend in your series of experimental runs there may be experimental errors affecting your results. The first thing to check is how you are making your measurements. Is the measurement method questionable or unreliable? Maybe you are reading a scale incorrectly, or maybe the measuring instrument is working erratically.
If you determine that experimental errors are influencing your results, carefully rethink the design of your experiments. Review each step of the procedure to find sources of potential errors. If possible, have a scientist review the procedure with you. Sometimes the designer of an experiment can miss the obvious.
References:
Visit your local library and find books about salt, water, general chemistry, physical chemistry or chemical physics. Look for chapters that discuss changes in physical properties of a substance when mixed with other substances.
List the books and the online resources that you use in this part of your report.
It is always important for students, parents and teachers to know a good source for science related equipment and supplies they need for their science activities. Please note that many online stores for science supplies are managed by MiniScience.
Testimonials
" I called School Time and my husband and son came with me for the tour. We felt the magic immediately."
- Robby Robinson
" My husband and son came with me for the tour. We felt the magic immediately."
- Zoe Ranson
Contact Info
Our address, working hours.
Week Days: 07:00-19:00
Saturday: 09:00-15:00
Sunday: Closed
Science Project

37 Water Science Experiments: Fun & Easy
We’ve curated a diverse selection of water related science experiments suitable for all ages, covering topics such as density, surface tension, water purification, and much more.
These hands-on, educational activities will not only deepen your understanding of water’s remarkable properties but also ignite a passion for scientific inquiry.
So, grab your lab coat and let’s dive into the fascinating world of water-based science experiments!
Water Science Experiments
1. walking water science experiment.
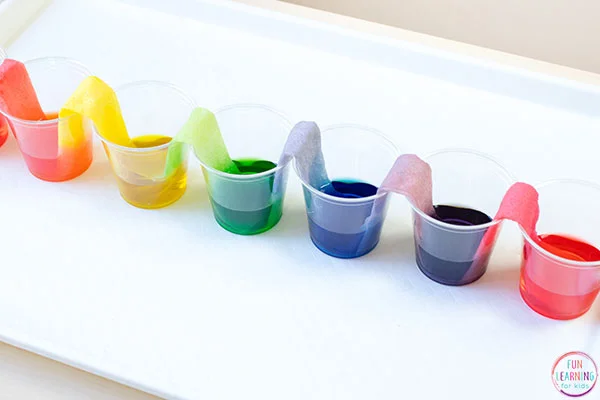
This experiment is a simple yet fascinating science experiment that involves observing the capillary action of water. Children can learn a lot from this experiment about the characteristics of water and the capillary action phenomenon. It is also a great approach to promote scientific curiosity and enthusiasm.
Learn more: Walking Water Science Experiment
2. Water Filtration Experiment
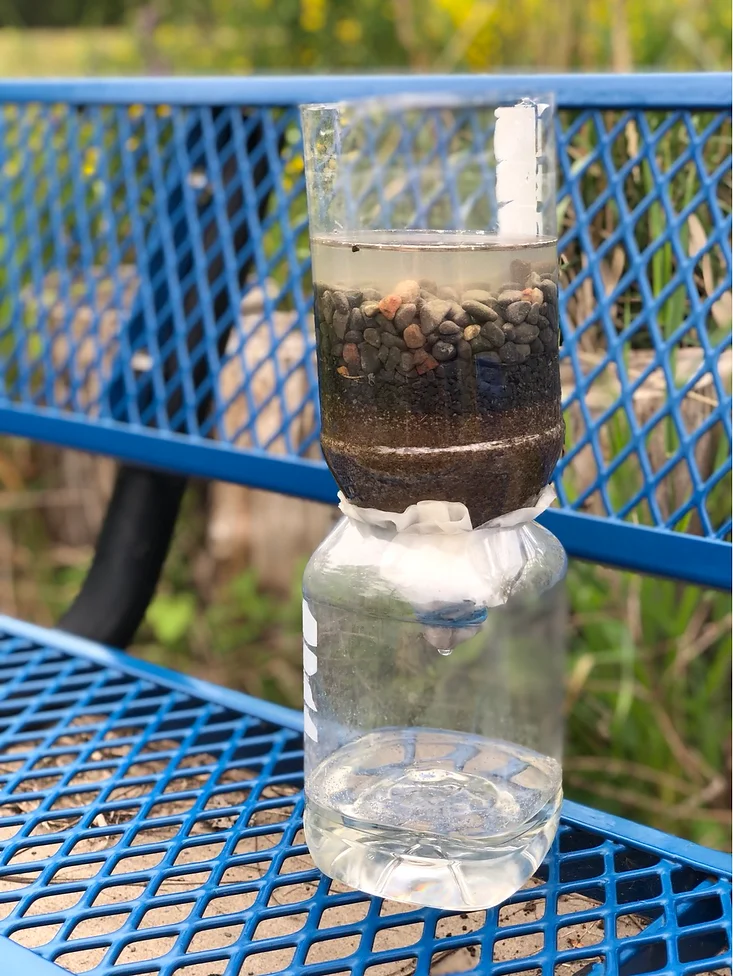
A water filtering experiment explains how to purify contaminated water using economical supplies. The experiment’s goal is to educate people about the procedure of water filtration, which is crucial in clearing water of impurities and contaminants so that it is safe to drink.
Learn more: Water Filtration Experiment
3. Water Cycle in a Bag
The water cycle in a bag experiment became to be an enjoyable and useful instructional exercise that helps students understand this idea. Participants in the experiment can observe the many water cycle processes by building a model of the water cycle within a Ziplock bag.
4. Cloud in a Jar
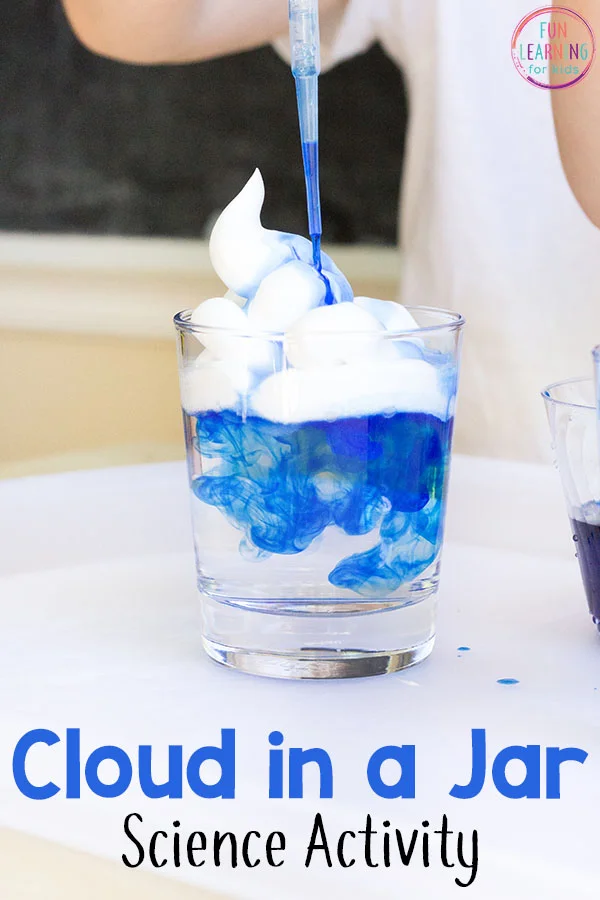
The rain cloud in a jar experiment is a popular instructional project that explains the water cycle and precipitation creation. This experiment is best done as a water experiment since it includes monitoring and understanding how water changes state from a gas (water vapor) to a liquid (rain) and back to a gas.
Learn more: Cloud in a Jar
5. The Rising Water
The rising water using a candle experiment is a wonderful way to teach both adults and children the fundamentals of physics while also giving them an exciting look at the properties of gases and how they interact with liquids.
6. Leak Proof Bag Science Experiment
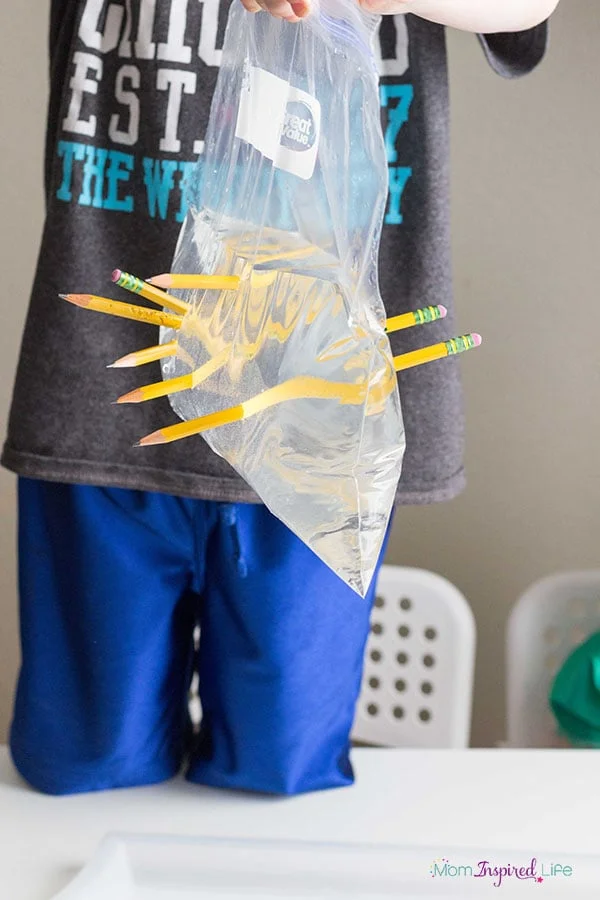
In the experiment, a plastic bag will be filled with water, and after that, pencils will be inserted through the bag without causing it to leak.
The experiments explain how the plastic bag’s polymer chains stretch and form a barrier that keeps water from dripping through the holes the pencils have produced.
Learn more: Leak Proof Bag Science Experiment
7. Keep Paper Dry Under Water Science Experiment
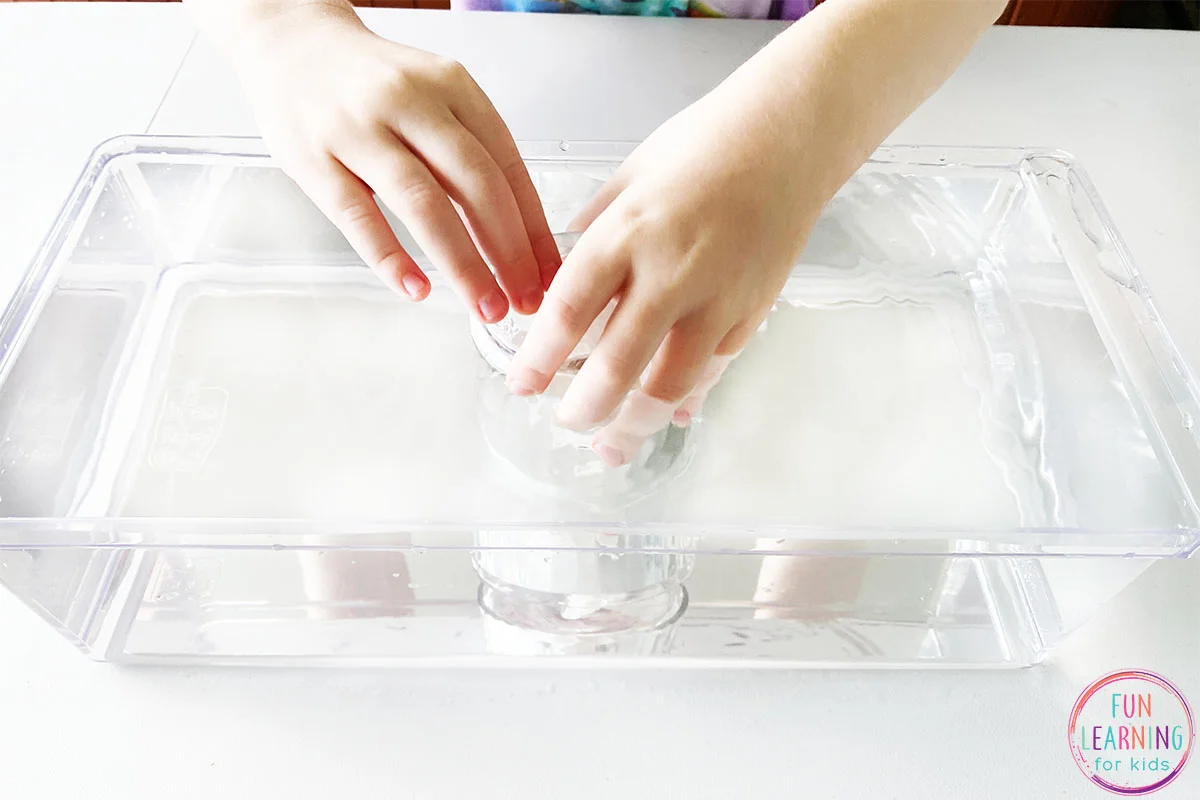
The experiment is an enjoyable way for demonstrating air pressure and surface tension for both adults and children. It’s an entertaining and engaging technique to increase scientific curiosity and learn about scientific fundamentals.
Learn more: Keep Paper Dry Under Water Science Experiment
8. Frozen Water Science Experiment
The Frozen Water Science Experiment is a fun and engaging project that teaches about the qualities of water and how it behaves when frozen.
You can gain a better knowledge of the science behind the freezing process and investigate how different variables can affect the outcome by carrying out this experiment.
9. Make Ice Stalagmites
10. Bending of Light
A fascinating scientific activity that explores visual principles and how light behaves in different surfaces is the “bending of light” water experiment. This experiment has applications in physics, engineering, and technology in addition to being a fun and interesting method to learn about the characteristics of light.
11. Salt on a Stick
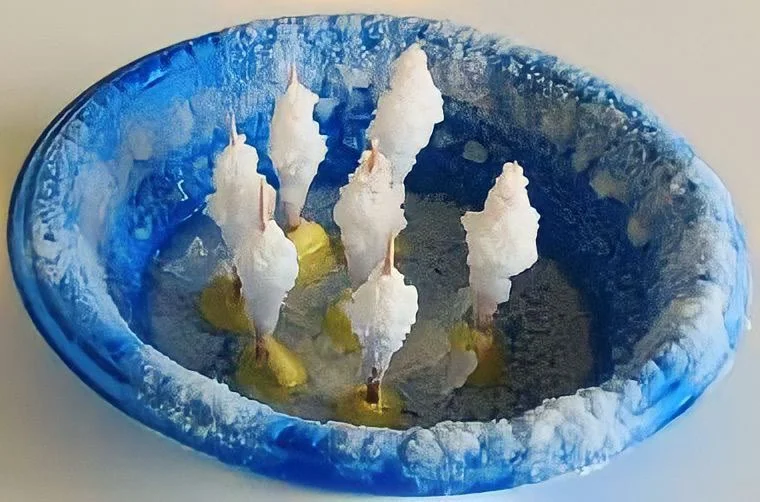
This experiment is an excellent way to catch interest, engage in practical learning, and gain a deeper understanding of the characteristics of water and how they relate to other substances. So the “Salt on Stick” water experiment is definitely worth trying if you’re looking for a fun and educational activity to try!
Learn More: Water Cycle Experiment Salt and Stick
12. Separating Mixture by Evaporation
This method has practical applications in fields like water processing and is employed in a wide range of scientific disciplines, from chemistry to environmental science.
You will better understand the principles determining the behavior of mixtures and the scientific procedures used to separate them by performing this experiment at home.
13. Dancing Spaghetti
Have you ever heard of the dancing spaghetti experiment? It’s a fascinating science experiment that combines simple materials to create a mesmerizing visual display.
The dancing spaghetti experiment is not only entertaining, but it also helps you understand the scientific concepts of chemical reactions, gas production, and acidity levels.
14. Magic Color Changing Potion
The magic color-changing potion experiment with water, vinegar, and baking soda must be tried since it’s an easy home-based scientific experiment that’s entertaining and educational.
This experiment is an excellent way to teach kids about chemical reactions and the characteristics of acids and bases while providing them an interesting and satisfying activity.
15. Traveling Water Experiment
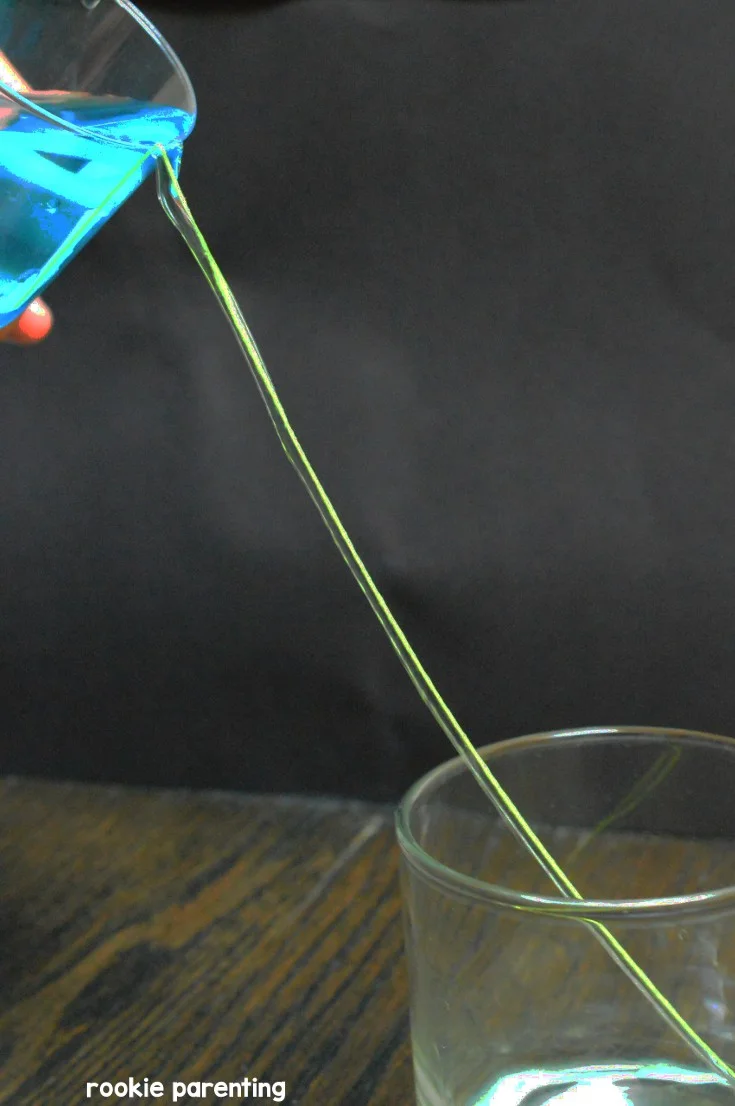
In this experiment, you will use simple objects like straws or strings to make a path for water to pass between two or more containers.
Learn more: Rookie Parenting
16. Dry Erase and Water “Floating Ink” Experiment
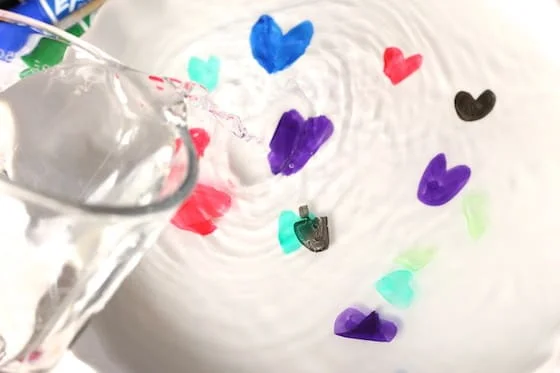
The dry-erase and water “floating ink” experiment offers an interesting look at the characteristics of liquids and the laws of buoyancy while also being a great method to educate kids and adults to the fundamentals of science.
Learn more: Dry Erase and Water Floating Ink Experiment
17. Underwater Candle
In this experiment, we will investigate a connection between fire and water and learn about the remarkable factors of an underwater candle.
18. Static Electricity and Water
19. Tornado in a Glass
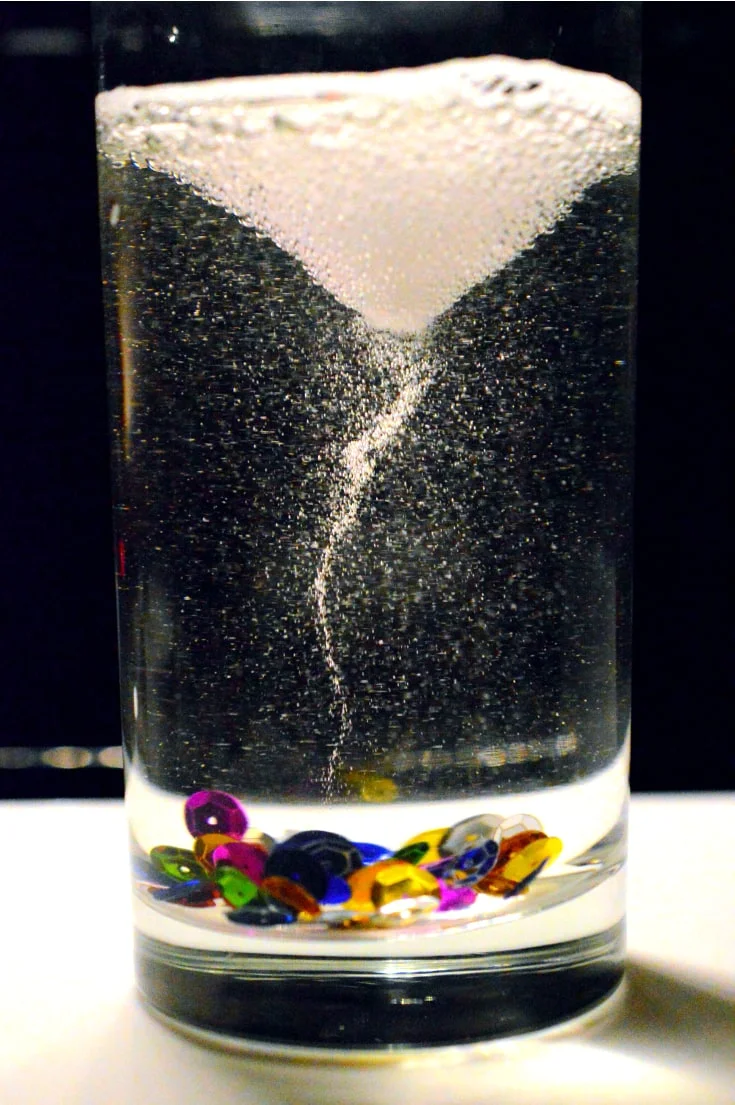
This captivating experiment will demonstrate how the forces of air and water can combine to create a miniature vortex, resembling a tornado.
Learn more: Tornado in a Glass
20. Make Underwater Magic Sand
Be ready to build a captivating underwater world with the magic sand experiment. This experiment will examine the fascinating characteristics of hydrophobic sand, sometimes referred to as magic sand.
21. Candy Science Experiment
Get ready to taste the rainbow and learn about the science behind it with the Skittles and water experiment! In this fun and colorful experiment, we will explore the concept of solubility and observe how it affects the diffusion of color.
Density Experiments
Density experiments are a useful and instructive approach to learn about the characteristics of matter and the fundamentals of science, and they can serve as a starting point for further exploration into the fascinating world of science.
Density experiments may be carried out with simple materials that can be found in most homes.
This experiment can be a great hands-on learning experience for kids and science lovers of all ages.

22. Super Cool Lava Lamp Experiment
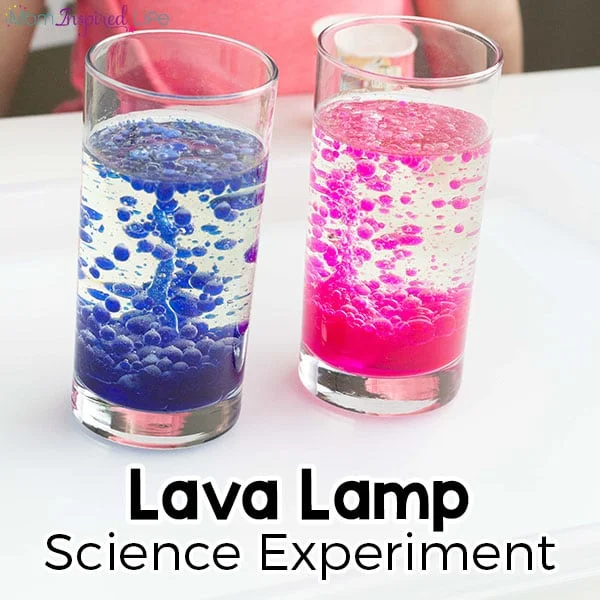
The awesome lava lamp experiment is an entertaining and educational activity that illustrates the concepts of density and chemical reactions. With the help of common household items, this experiment involves making a handmade lava lamp.
Learn more: Lava Lamp Science Experiment
23. Denser Than you Think
Welcome to the fascinating world of density science! The amount of matter in a particular space or volume is known as density, and it is a fundamental concept in science that can be seen everywhere around us.
Understanding density can help us figure out why some objects float while others sink in water, or why certain compounds do not mix.
24. Egg Salt and Water
Learn about the characteristics of water, including its density and buoyancy, and how the addition of salt affects these characteristics through performing this experiment.
25. Hot Water and Cold-Water Density
In this experiment, hot and cold water are put into a container to see how they react to one other’s temperatures and how they interact.
Sound and Water Experiments
Have you ever wondered how sound travels through different mediums? Take a look at these interesting sound and water experiments and learn how sounds and water can affect each other.
26. Home Made Water Xylophone
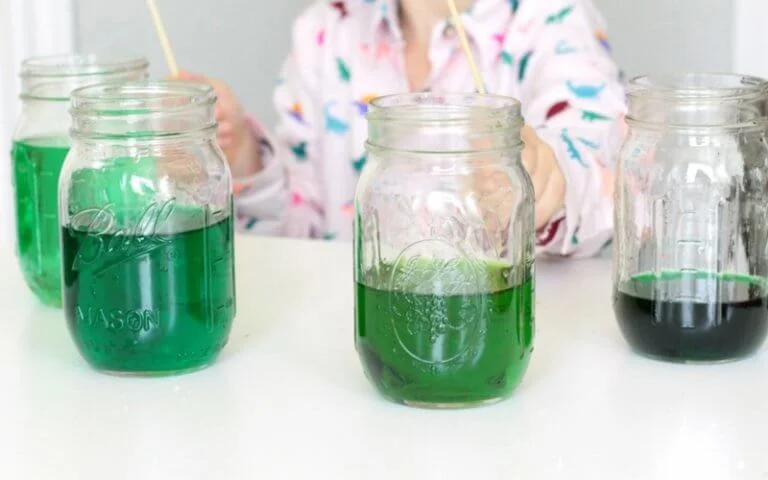
You can do this simple scientific experiment at home using a few inexpensive ingredients to create a handmade water xylophone.
The experiment demonstrates the science of sound and vibration and demonstrates how changing water concentrations can result in a range of tones and pitches.
Learn more: Home Made Water Xylophone
27. Create Water Forms Using Sound!
A remarkable experiment that exhibits the ability of sound waves to influence and impact the physical world around us is the creation of water formations using sound.
In this experiment, sound waves are used to generate patterns and shapes, resulting in amazing, intricate designs that are fascinating to observe.
28. Sound Makes Water Come Alive
These experiments consist of using sound waves to create water vibrations, which can result in a variety of dynamic and captivating phenomena.
29. Water Whistle
The water whistle experiment includes blowing air through a straw that is submerged in water to produce a whistle.
This experiment is an excellent way to learn about the characteristics of sound waves and how water can affect them.
Water Surface Tension Experiments
You can observe the effects of surface tension on the behavior of liquids by conducting a surface tension experiment.
By trying these experiments, you can gain a better understanding of the properties of liquids and their behavior and how surface tension affects their behavior.
30. Floating Paperclip
In this experiment, you will put a paper clip on the top of the water and observe it float because of the water’s surface tension.
31. Water Glass Surface Tension
Have you ever noticed how, on some surfaces, water drops may form perfect spheres? The surface tension, which is a characteristic of water and the cohesive force that holds a liquid’s molecules together at its surface, is to blame for this.
32. Camphor Powered Boat
The camphor-powered boat experiment is a fun and fascinating way to explore the principles of chemistry, physics, and fluid mechanics. In this experiment, a miniature boat is used to travel across the water’s surface using camphor tablets.
33. Pepper and Soap Experiment
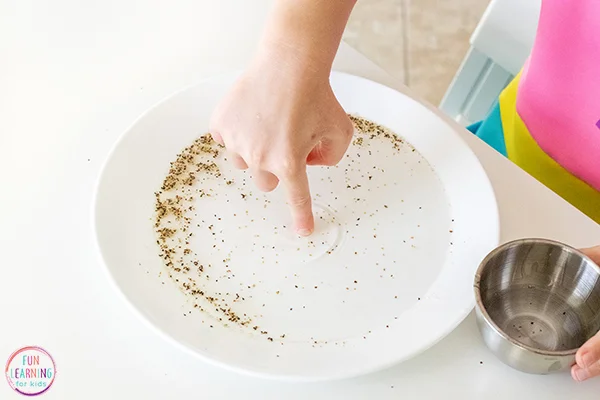
The pepper in a cloud experiment is a simple and interesting activity that explains the concept of surface tension. This experiment includes adding pepper to a bowl of water and then pouring soap to the mixture, causing the pepper to move away from the soap.
Learn more: Pepper and Soap Experiment
Boiling Water Experiments
Experiments with boiling water are an engaging and informative way to learn about physics, chemistry, and water’s characteristics.
These investigations, which include examining how water behaves when it changes temperature and pressure, can shed light on a variety of scientific phenomena.
It’s important to take the proper safety measures when performing experiments with hot water. Boiling water can produce steam and hot particles that are dangerous to inhale in and can result in severe burns if it comes into contact with skin.
34. Make It Rain
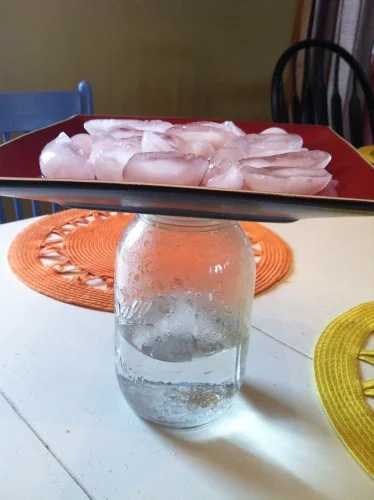
This experiment can be accomplished using basic supplies that can be found in most homes, make it an excellent opportunity for hands-on learning for both kids and science lovers.
Learn more: Make it Rain
35. Fire Water Balloons
Learning about the fundamentals of thermodynamics, the behavior of gases, and the effects of heat on objects are all made possible by this experiment.
36. Boil Water with Ice
The Boiling Water with Ice experiment is an engaging and beneficial approach to learn about temperature and the behavior of water. It can also serve as an introduction for further discovery into the wonderful world of science.
37. Boil Water in a Paper Cup
The “boil water in a cup” experiment is an easier but powerful approach to illustrate the idea of heat transmission by conduction. This experiment is often used in science classes to teach students about thermal conductivity and the physics of heat transfer.
Similar Posts:
- 68 Best Chemistry Experiments: Learn About Chemical Reactions
- Top 100 Fine Motor Skills Activities for Toddlers and Preschoolers
- Top 50 Fun Food Science Experiments
Leave a Comment Cancel reply
Save my name and email in this browser for the next time I comment.

- Science Notes Posts
- Contact Science Notes
- Todd Helmenstine Biography
- Anne Helmenstine Biography
- Free Printable Periodic Tables (PDF and PNG)
- Periodic Table Wallpapers
- Interactive Periodic Table
- Periodic Table Posters
- Science Experiments for Kids
- How to Grow Crystals
- Chemistry Projects
- Fire and Flames Projects
- Holiday Science
- Chemistry Problems With Answers
- Physics Problems
- Unit Conversion Example Problems
- Chemistry Worksheets
- Biology Worksheets
- Periodic Table Worksheets
- Physical Science Worksheets
- Science Lab Worksheets
- My Amazon Books
How to Boil Water at Room Temperature

The normal boiling point of water is 100 °C or 212 °F, but it’s possible to boil water at room temperature . Here are easy ways to demonstrate this and an explanation of how it works.
Two Ways to Boil Water at Room Temperature
Simple syringe demonstration.
All you need is a large syringe and water. There’s no needle involved, so this demonstration is a safe way for kids to explore boiling point.
- Draw a small volume of water into the syringe using the plunger. Don’t fill the syringe, but add enough water that you’ll be able to see it boil.
- Seal the bottom of the syringe so it can’t get more air or water. Cap it (if a cap came with the syringe), place your finger over the opening, or seal it with tape.
- Now, boil the water at room temperature. All you do is pull back as quickly as possible on the syringe plunger.
It may take a couple of tries to perfect your technique. If you like, set up your phone to take video so you can concentrate on boiling the water. Then, watch it later.
Boil Water Using a Vacuum Pump
The classic demonstration uses a vacuum pump. The advantage is you boil a larger volume of water so it’s easier to observe. Of course, the disadvantage is that you need a vacuum pump!
- Fill a 250-ml beaker with about 150 ml of warm water.
- Cover the beaker with a bell jar.
- Connect and run the vacuum pump.
- Once the pressure becomes low enough, the water boils.
This demonstration works best with warm water because it already has a higher vapor pressure than cold water. This means the vacuum pump boils water more quickly. This is good because prolonged exposure to water vapor gets water in the hose and pump.
How It Works

Water (or any liquid) boils when its vapor pressure equals atmospheric pressure . The normal boiling point applies to 1 atm of pressure (sea level). So, water boils at a lower temperature at lower pressure. This is why there are high-altitude cooking instructions. Lowering the pressure further brings down the boiling point temperature. In fact, you can boil water at temperatures colder than room temperature. Water isn’t a liquid at all when the pressure approaches a vacuum . Ice undergoes sublimation directly into water vapor, in much the way dry ice turns into carbon dioxide gas.
What Pressure Does Water Boil at Room Temperature?
There pressure at which water boils at room temperature depends on the temperature of the water. Warmer water has a higher vapor pressure, so it boils at a higher pressure than cold water.
Aside from experimentation, there are two ways to find the pressure at which water boils at a given temperature. You can consult a water phase diagram or you can look up the vapor pressure of water as a function of temperature on a table. Here are some sample values:
Converting units, water boils at room temperature at a pressure between 0.02 and 0.03 atm. In other words, water boils at room temperature when pressure is about 1/40th normal atmospheric pressure.
- Goldberg, David E. (1988). 3,000 Solved Problems in Chemistry (1st ed.). McGraw-Hill. sISBN 0-07-023684-4.
- Predel, Bruno; Hoch, Michael J. R.; Pool, Monte (2004). Phase Diagrams and Heterogeneous Equilibria: A Practical Introduction . Springer. ISBN 978-3-540-14011-5.
- Reel, Kevin R.; Fikar, R. M.; Dumas, P. E.; Templin, Jay M.; Van Arnum, Patricia (2006). AP Chemistry (REA) – The Best Test Prep for the Advanced Placement Exam (9th ed.). Research & Education Association.ISBN 0-7386-0221-3.
- Shakhashiri, B.Z. (1985). Chemical Demonstrations: A Handbook for Teachers . Volume 2. Wisconsin. 81-84.
Related Posts
Remember Me

Experiment Boiling Temperature of Water Experiments
Boiling temperature of water.
Experiment #2 from Physical Science with Vernier
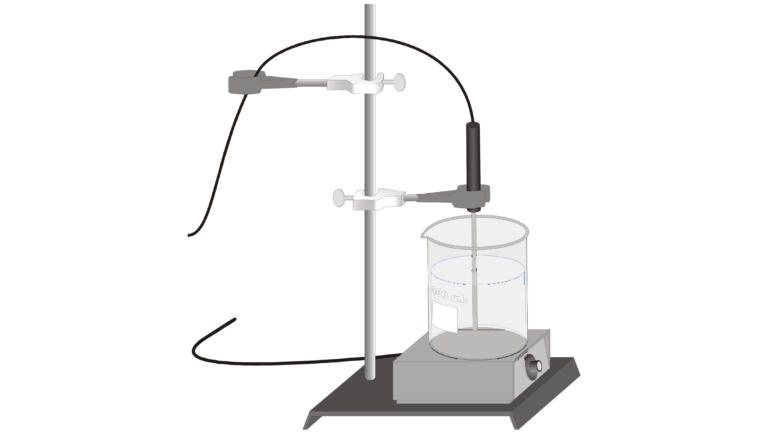
Introduction
The physical properties of a pure substance can be used to identify the substance and distinguish it from other pure substances. Boiling temperature is one such physical property. Boiling is characterized by the formation of vapor bubbles within the liquid phase as a substance changes from a liquid to a gas. In this experiment, you will study the boiling of water.
In this experiment, you will
- Observe the boiling of water.
- Use a computer to make measurements.
- Analyze the data.
- Graph the data.
- Use the graph to make conclusions about boiling.
- Determine the boiling temperature of water.
- Apply the concepts studied in a new situation.
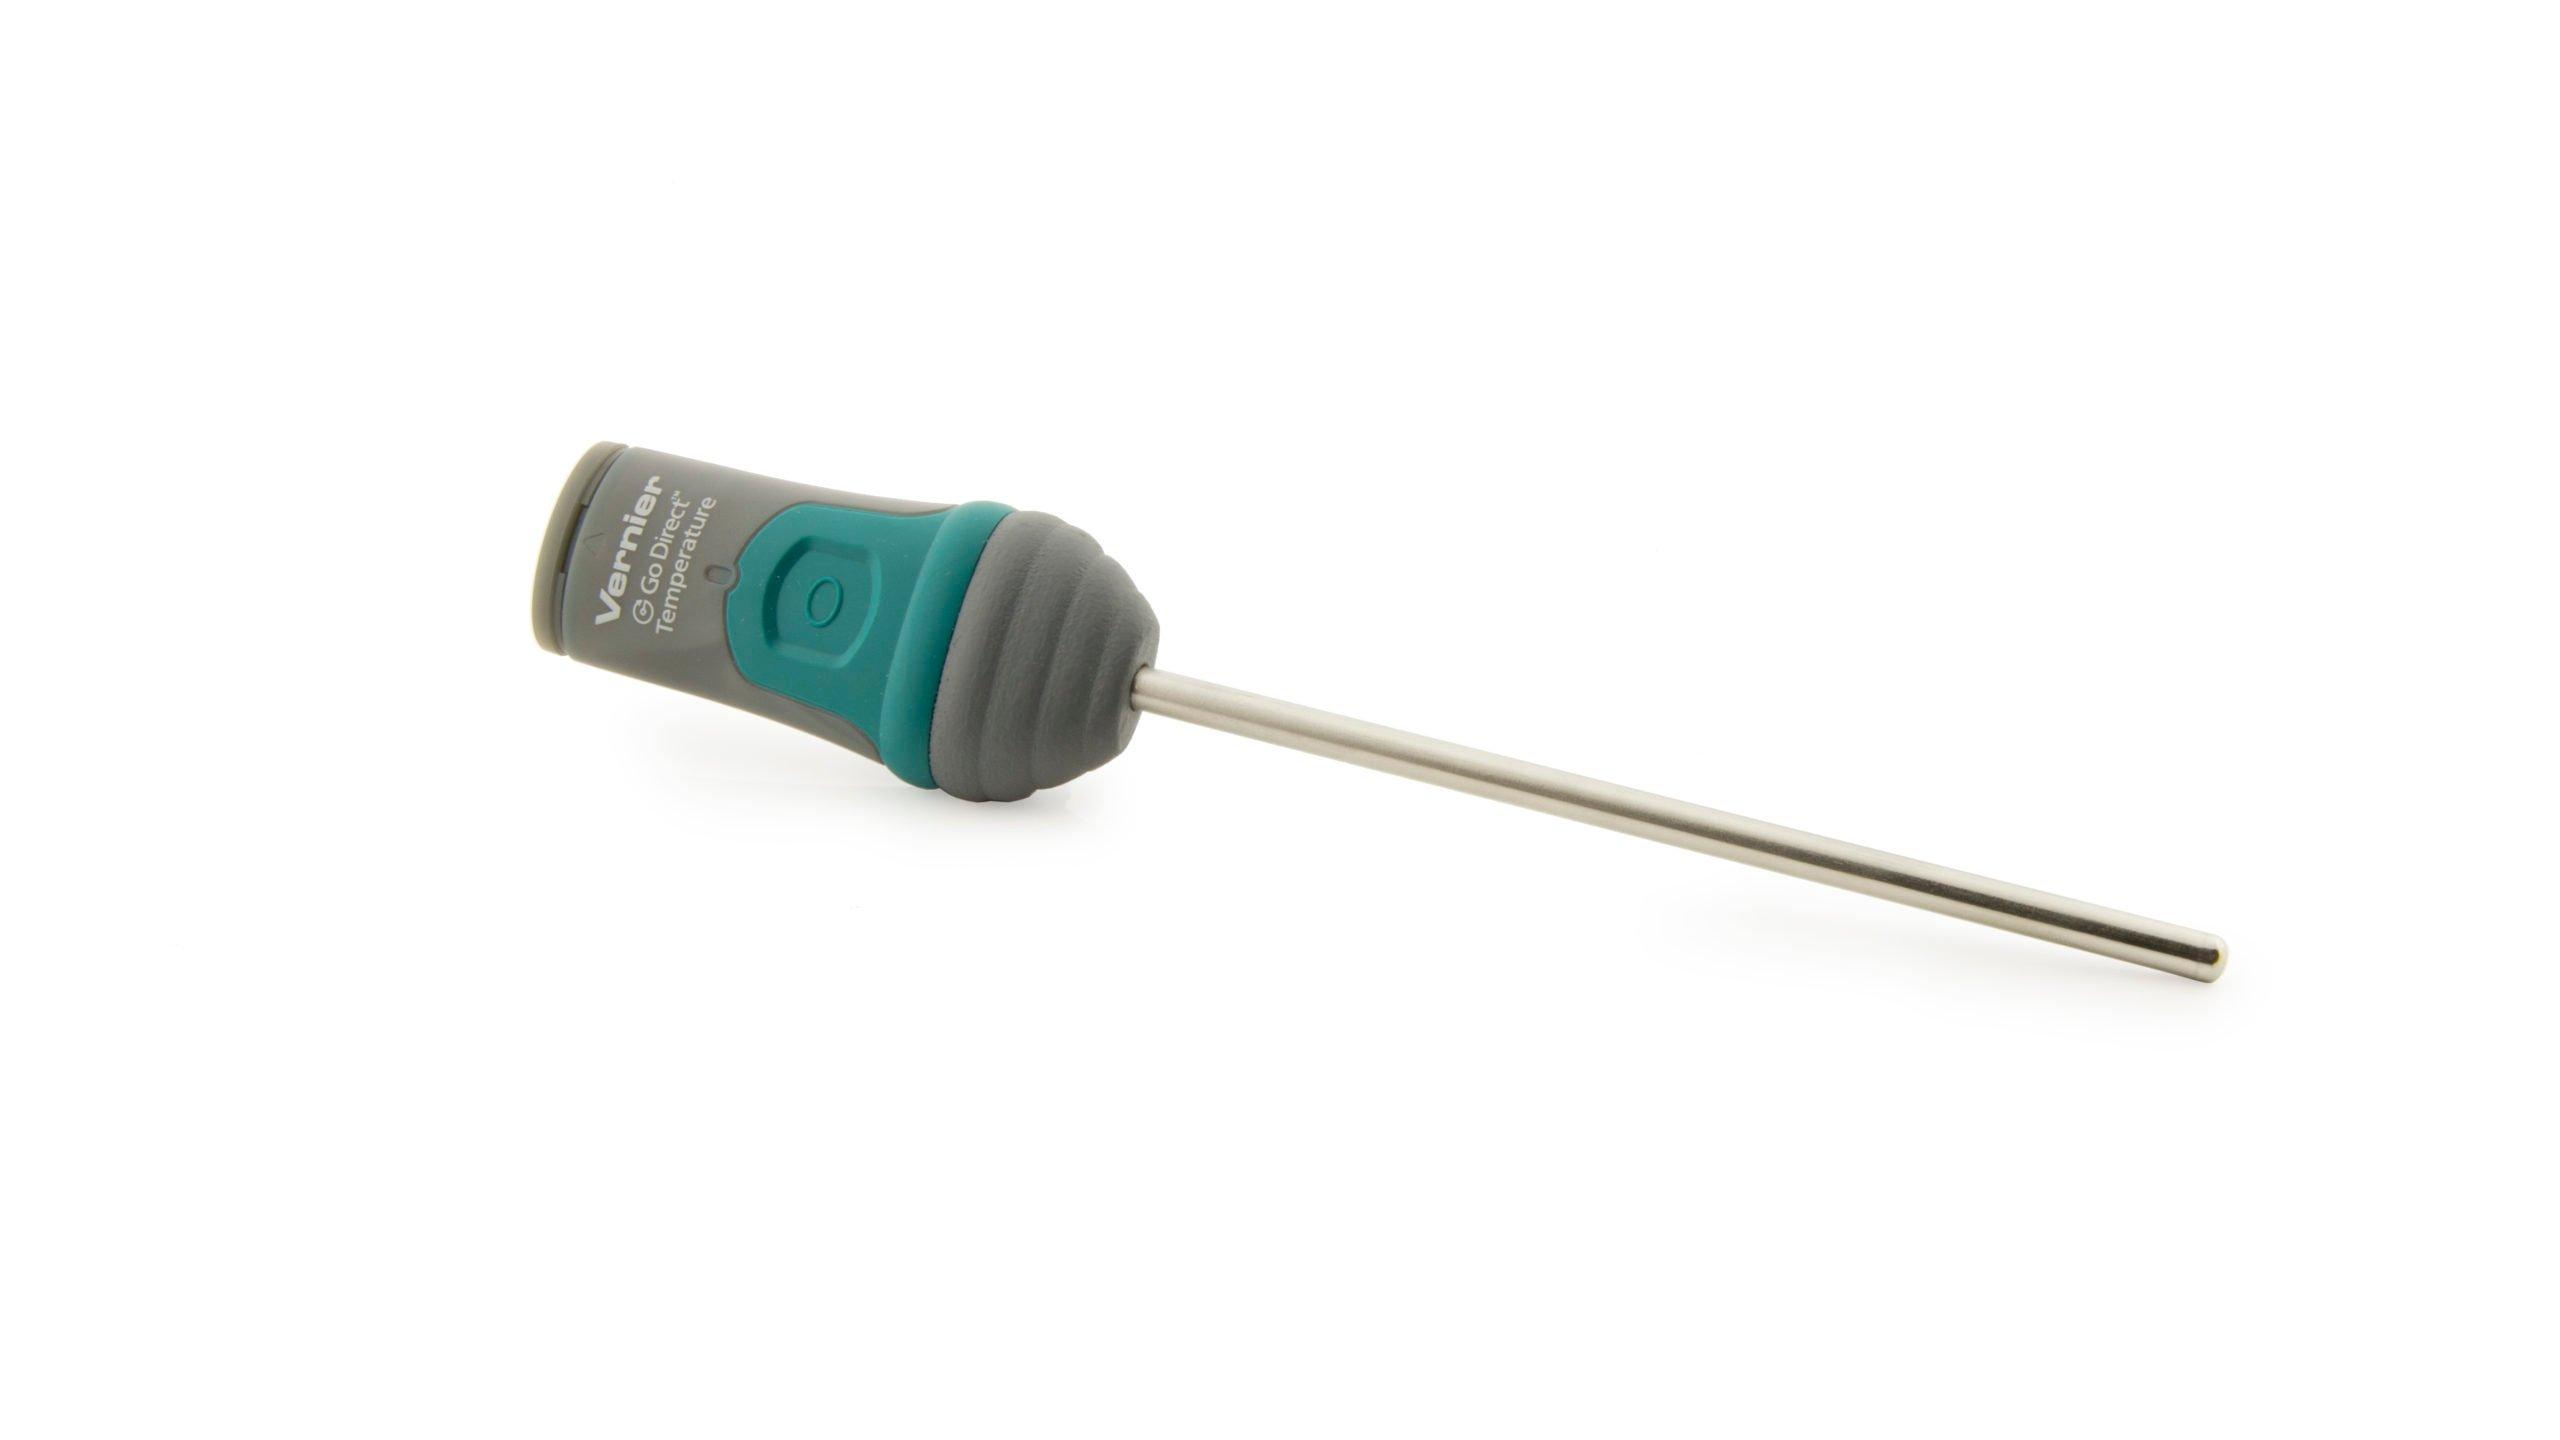
Sensors and Equipment
This experiment features the following sensors and equipment. Additional equipment may be required.
Ready to Experiment?
Ask an expert.
Get answers to your questions about how to teach this experiment with our support team.
- Call toll-free: 888-837-6437
- Chat with Us
- Email [email protected]
Purchase the Lab Book
This experiment is #2 of Physical Science with Vernier . The experiment in the book includes student instructions as well as instructor information for set up, helpful hints, and sample graphs and data.

Talk to our experts
1800-120-456-456
CBSE Chemistry Experiment Determination of Boiling Point

Chemistry Experiment - Determination of Boiling Point
The boiling point is a physical change in the state of any compound. For example: When we boil water, it changes into water vapours, i.e., steam. The boiling point is a specific temperature at which that liquid converts into a gaseous state. Water boils at 100℃; it converts into gaseous form at 1 atmospheric pressure. It has many uses in our daily life.
A pressure cooker works on the principle of boiling point. In a pressure cooker, food cooks faster due to the increase in the pressure; the boiling point of water also increases around 121 o C.
Another example is antifreeze in car radiators. In car radiators, the hot weather combines with a hot engine and elevates the temperature of the water in the radiator, which can damage the engine. Antifreeze has a high boiling point, which protects the engine from overheating.
Table of Content
Apparatus required.
Determination of Boiling point of Organic Compounds
Observation
Precautions.
Determination of the boiling points of the organic compounds (Benzene, Benzaldehyde, Butane, Diethyl ether, Butanol, n-pentane, neopentane, Pentene, Heptene and Octene) through experiment.
A Glass beaker
A test tube
A thermometer
A tripod stand
A capillary tube
An iron stand with a clamp
A wire gauze
Liquid paraffin
Con. H 2 SO 4
Liquid/ Solid compound
The boiling point theory says the boiling point is the temperature at which a liquid converts into vapours at a pressure equal to atmospheric pressure.
The boiling point of organic compounds gives essential information about compounds, like their physical properties and structural characteristics.
It is an indicator of the compound's volatility; the compound has a higher boiling point and a lesser rate of volatility.
The boiling point of a liquid depends upon
The strength of the intermolecular force.
Carbon-carbon chain
The strength of intermolecular forces: The compounds that have no functional group have less dipole-dipole interaction and have low boiling points than the compound having a functional group.
Carbon-Carbon Chain effect on boiling Point: As the length of the carbon chain increases, the compound's boiling point also increases.
Effect of Branching on Boiling Point: Branching in the compound decreases the boiling points as the surface area of the compound increases, and the Vander Waal dispersion also decreases. Vander Waal interaction is directly proportional to the surface area of the compound.
The order of boiling points in the organic compound is like this;
(The intermolecular forces in ionic bond> hydrogen Bonding> Dipole-dipole interaction> Vander-Waals forces)
Here is the procedure for the boiling point determination experiment for organic compounds like benzaldehyde and other compounds.
First, set up the boiling point apparatus like a tripod stand, burner, and clamp stand.
Fill the given liquid in the test tube to ⅔ whose boiling has to find.
Fix the test tube with a thermometer with the help of a rubber band.
Now attach the test tube with the clamp of the stand in such a way that the test tube with a thermometer is dipped in the liquid paraffin bath.
Now take a capillary of about 5-6 cm sealed from one end, and then place it in the test tube containing liquid.
Start the burner, heat the paraffin bath, and stir it slowly.
Keep an eye on the thermometer to check the temperature.
The liquid starts boiling, and bubbles are seen escaping liquid from the capillary dipping.
Now note the temperature at which the liquid starts boiling and steam comes out.
Then remove the flame and note the temperature.
Find the mean of the two temperatures, which will be the boiling point of that liquid.
Note: If we are measuring the solid boiling point , we will use con.H 2 SO 4 instead of liquid paraffin.
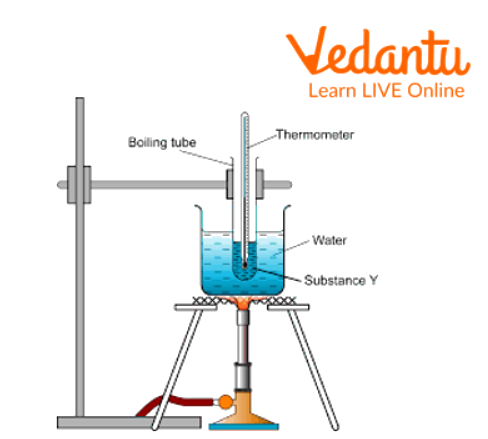
Boiling Point Apparatus Diagram
Determination of Boiling Point of Organic Compounds
First, set up the boiling point apparatus.
Then, take a test tube and fill ⅔ of the benzene in the test tube.
Then tie the test tube with a thermometer and pour them into the beaker containing liquid paraffin, as shown in the boiling point apparatus diagram.
Start heating the beaker, note the temperatures t1 and t2 for benzene, and calculate the mean temperature.
Now, take another test tube and, fill that with benzaldehyde, repeat the same process.
Note the temperatures when benzaldehyde starts boiling t 1 and when the vapour comes out the t 2 , then calculate the mean temperature.
Mean Temperature= \[\dfrac{{{t_1} + {t_2}}}{2}\]
Here are the boiling point determination experiment readings.
Observation Table 1:
The boiling point of benzene is 78 o C and benzaldehyde is 178 o C.
The boiling point of butane, di ethyl ether and butanol is -1 o C, 36.4 o C and 117.7 o C.
The boiling point of pentene, heptene, and octene is 36 o C, 98.4 o C and 125.7 o C.
The boiling point of n-pentane and neo-pentane is 36 o C and 9.5 o C.
Perform experiments in presence of a teacher or lab assistant.
Keep the thermometer bulb and the test tube at the same level.
Be conscious while recording temperature to minimize the error and note the readings when the liquid starts bubbling from the lower end of the capillary.
Make sure one end of the capillary is sealed properly.
Keep stirring the paraffin liquid for uniform heating.
Handle the Bunsen burner carefully.
Add boiling chips to the solution to avoid bumping.
Lab Manual Questions
1. What will you learn from this experiment?
Ans. You learn to define the boiling point of different organic and inorganic compounds, and it helps you identify the physical and structural properties of compounds.
2. What are the precautions taken while experimenting to find the boiling point?
Ans. We have to make sure that one end of the capillary is sealed properly. Keep the level of the ignition tube and bulb of the thermometer at the same level. Keep stirring the liquid paraffin for uniform heating.
3. How do remove errors while calculating boiling point?
Ans . To remove errors in the value of the boiling point calculated, we must take a 3% correction in the observed value of the boiling point. Then add this correction to the observed temperature. This is necessary as the boiling point changes due to changes in atmospheric pressure.
(Actual Boiling Point = Observed Boiling Point + 3% of observed Boiling Point)
4. What can we add to a given solution to avoid the bumping of liquid?
Ans. We must add boiling chips to the liquid to avoid bumping the liquid.
Viva Questions
1. Explain the factors that affect the boiling point of an organic compound.
Ans . The boiling point of organic compounds is affected by atmospheric pressure, the strength of the intermolecular forces, branching in the organic compound, and the length of the carbon-carbon chain in hydrocarbons.
2. Define the boiling point theory.
Ans. The boiling point is the temperature at which the vapour pressure of the solution is equal to the vapour pressure of the surroundings.
3. Differentiate between boiling point and melting point.
Ans .
4. The boiling point of a compound indicates what?
Ans . The boiling point of a compound indicates its purity, stability, and volatility of a compound.
5. What is the effect of atmospheric pressure on the boiling point?
Ans. The boiling point of the liquid increases by increasing the atmospheric pressure. The boiling point is lower in mountains and higher on sea surfaces, so the boiling point is low on mountains and high on sea surfaces.
6. Why is the boiling point of water at the sea surface is 100 o C more than it is at Mount Everest, 69 o C?
Ans. When the atmospheric pressure is higher, the boiling point of the liquid increases, at the sea surface where atmospheric pressure is 1 atm and the atmospheric pressure in mountains is low so the boiling of water also decreases.
7. Which liquid bath is used when the temperature of the compound is more than 100 o C?
Ans. The liquid paraffin for liquids and con. H 2 SO 4 is used for a solid boiling point as a bath to find the boiling point.
8. Why is the boiling point of solids more than liquid compounds at room temperature?
Ans. There is no such rule that liquid boils at lower temperatures and solid boils at high temperatures. Solid Lead iodide melts at 402 o C and then boils at 954 o C. Water is a liquid that boils at 100 o C, but some liquids like mercury boil at 357 o C while mercury bromide boiling of solid is an example , as it boils at 236 o C at room temperature.
9. What happens if a non-volatile liquid is added to the pure liquid?
Ans. The boiling point of the pure liquid increases upon adding a non-volatile liquid.
10. Why do carboxylic acids have a higher boiling point than hydrocarbons?
Ans. The carboxylic acids form intermolecular bonding that stabilizes the compound, while hydrocarbons do not form an intermolecular bond.
Practical Question
1. What is the boiling point of benzene?
None of the above.
Ans. The boiling point of benzene is 78 o C.
2. What happens if we add sodium hydroxide to the water?
The boiling point of water increases.
The boiling point of water decreases.
The evaporation rate increases.
The evaporation rate decreases.
Ans. If we add sodium hydroxide to the water, the boiling point of the water increases.
3. While performing the boiling point determination experiment, the ignition tube and bulb of the thermometer were kept in a beaker at?
At the bottom of the beaker
Above the liquid paraffin
Properly dipped in liquid paraffin.
Ans. While performing the boiling point determination experiment, the ignition tube and bulb of the thermometer were kept in a beaker and properly dipped in liquid paraffin.
4. What happens when the atmospheric pressure decreases?
The boiling point of the liquid increases.
The boiling point of the liquid decreases.
The melting point decreases.
None of the above.
Ans. When the atmospheric pressure, decreases, the boiling point of liquid decreases.
5. Boiling of solid is an example of an ________________
Atmospheric pressure is equal to vapour pressure.
Atmospheric pressure is more than vapour pressure.
Atmospheric pressure is lower than vapour pressure.
Ans. The boiling of a solid is an example of atmospheric pressure being equal to vapour pressure.
6. Which compound has the highest boiling point?
Ans . Heptane is the compound that has the highest boiling point.
7. The boiling point of an impure liquid is higher or lower?
Remains the same as pure liquid.
Lower from the pure liquid.
Higher than pure liquid.
None of the above.
Ans. The boiling point of an impure liquid is higher than pure liquid.
8. The boiling point of a liquid depends upon the_________
Carbon-hydrogen bond
Molecular Weight
All of the above.
Ans. The boiling point of a liquid depends upon the strength of the intermolecular force and molecular weight.
9. The methods of measuring boiling points?
Fractional method
Thiele Tube Method
Reflux Method
All of the above
Ans. The methods used to measure the boiling points are Thiele Tube Method and the Reflux Method.
10. The vapour pressure depends upon which factors?
Kinetic Energy
Structure of the molecule
Temperature.
Velocity, kinetic energy, and temperature.
Ans. The vapour pressure depends upon velocity, kinetic energy, and temperature.
From the above experiment, we have found the boiling point of benzene is less than benzaldehyde. The boiling point of pentene, heptene and octene increases by increasing the branching in the carbon-carbon chain. In the other group of compound butane, di ethyl ether and butanol the boiling point is increased in the derivative from the pure compound.
FAQs on CBSE Chemistry Experiment Determination of Boiling Point
1. What is the effect of boiling point on liquids?
On boiling, the molecules of the liquid gain energy and starts bumping into the wall of the vessel. When they reach a critical point, they leave the vessel and evaporate.
2. What is the importance of finding the boiling points?
The experiment helps identify the compounds, their purity, and their physical and structural properties. It also helps in the storage and transportation of compounds.
3. What is the purpose of boiling a liquid?
The purpose of boiling a liquid is to purify that liquid through the distillation, or an evaporation method. Another purpose is to kill the bacteria and microbes present in it.
4. What are the factors that affect the boiling point?
The boiling point of organic compounds is affected by;
Temperature,
Atmospheric pressure,
Vapour pressure,
Intermolecular forces, etc.


IMAGES
VIDEO
COMMENTS
A series of experiments that includes a control is called a "controlled experiment." Introduction: In this experiment you will test the effect of table salt (sodium chloride) on the boiling point of water. You may repeat this experiment with other solutes such as sugar, Epsom salt (Magnesium sulfate) and Salt cake (Sodium sulfate).
Boiling Water Experiments. Experiments with boiling water are an engaging and informative way to learn about physics, chemistry, and water's characteristics. These investigations, which include examining how water behaves when it changes temperature and pressure, can shed light on a variety of scientific phenomena. ...
In this experiment, you have three different liquids: the original liquid, the distillate, and the concentrated solution that is left over after boiling. Think of ways besides color and taste to compare the three liquids. For example: ... As solute molecules are added to water, the boiling point increases. You could heat each of the liquids and ...
from a liquid to a gas. In this experiment, you will study the boiling of water. OBJECTIVES In this experiment, you will • Observe the boiling of water. • Use an EasyTemp probe to measure temperature. • Make a graph of the data. • Use the graph to make conclusions about boiling. • Determine the boiling temperature of water.
Not only does the water in your syringe appear to be boiling, it is boiling. Living as we do at typical atmospheric pressures, we tend to think that water has to be hot to boil. But the transition from liquid to gas can occur not just as the result of increased temperature, but also as the result of decreased pressure.
In this series of experiments, students observe illustrations of the thermal properties of water using a Bunsen burner, a paper cup and a balloon. The fact that water has a boiling point of 100 °C means that paper will not reach its ignition temperature if water is heated in a paper cup.
Water (or any liquid) boils when its vapor pressure equals atmospheric pressure.The normal boiling point applies to 1 atm of pressure (sea level). So, water boils at a lower temperature at lower pressure. This is why there are high-altitude cooking instructions.
The physical properties of a pure substance can be used to identify the substance and distinguish it from other pure substances. Boiling temperature is one such physical property. Boiling is characterized by the formation of vapor bubbles within the liquid phase as a substance changes from a liquid to a gas. In this experiment, you will study the boiling of water.
To Determine the Boiling Point of Water Experiment. Add a couple of pumice stones to a boiling tube of 25-30 ml of water. As illustrated in the boiling tube diagram below, attach and set the thermometer atop the water in the boiling tube and note the temperature. Underneath the boiling tube, place a Bunsen burner.
The boiling point is a physical change in the state of any compound. For example: When we boil water, it changes into water vapours, i.e., steam. The boiling point is a specific temperature at which that liquid converts into a gaseous state. Water boils at 100℃; it converts into gaseous form at 1 atmospheric pressure.